CloudPanel
CloudPanel is a lightweight and fast server management control panel, designed for Linux-based servers such as Ubuntu and Debian. This panel simplifies the management of PHP-based applications, including WordPress, Laravel, and others, through an intuitive interface. CloudPanel supports Nginx as the primary web server, allowing flexible installation of PHP versions, as well as providing MySQL/MariaDB and Redis database management. Additionally, CloudPanel offers free SSL integration with Let’s Encrypt, built-in security features such as firewalls and IP whitelisting, and server monitoring to track resource usage. With optimal performance, CloudPanel is an ideal solution for developers and system administrators seeking server management without excessive complexity.
1. Persyaratan Sistem
System requirements untuk menjalankan CloudPanel:
- OS Ubuntu 22.04/24.04, Debian 11/12
- 1 CPU
- 2 GB RAM
- 10 GB Disk
Sebelum memulai install, siapkan:
- VPS atau server dengan OS Ubuntu 24.04
- Akses SSH ke server
- Domain yang sudah diarahkan ke server
2. Persiapan Server
Login ke server
ssh user@IP-SERVERSwitch to the root user
sudo su -Update the system
apt update
apt upgrade -y
3. Install CloudPanel
Install CloudPanel with MariaDB 10.11
curl -sS https://installer.cloudpanel.io/ce/v2/install.sh -o install.sh; \
echo "a3ba69a8102345127b4ae0e28cfe89daca675cbc63cd39225133cdd2fa02ad36 install.sh" | \
sha256sum -c && sudo DB_ENGINE=MARIADB_10.11 bash install.sh
If the CloudPanel installation is complete, a message like the one below will be displayed.
The installation of CloudPanel is complete!
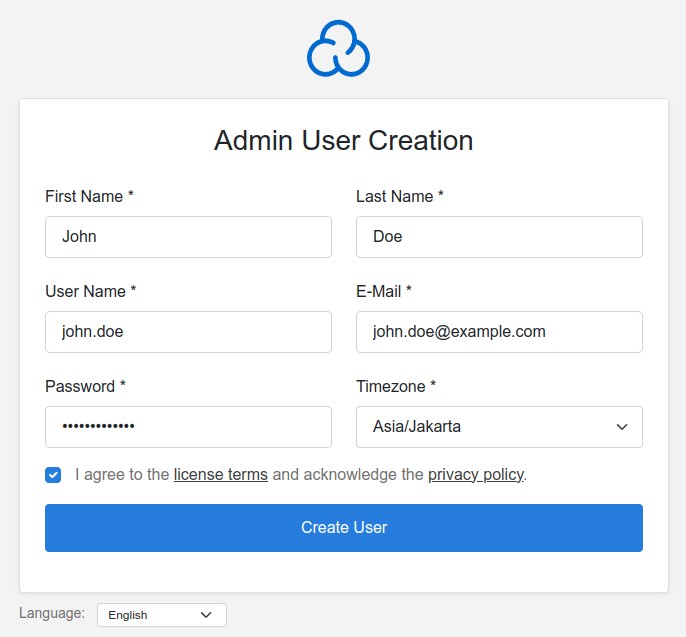
CloudPanel can be accessed now: https://159.223.234.56:8443 Access the CloudPanel URL, then fill in the admin account creation form, and log in.
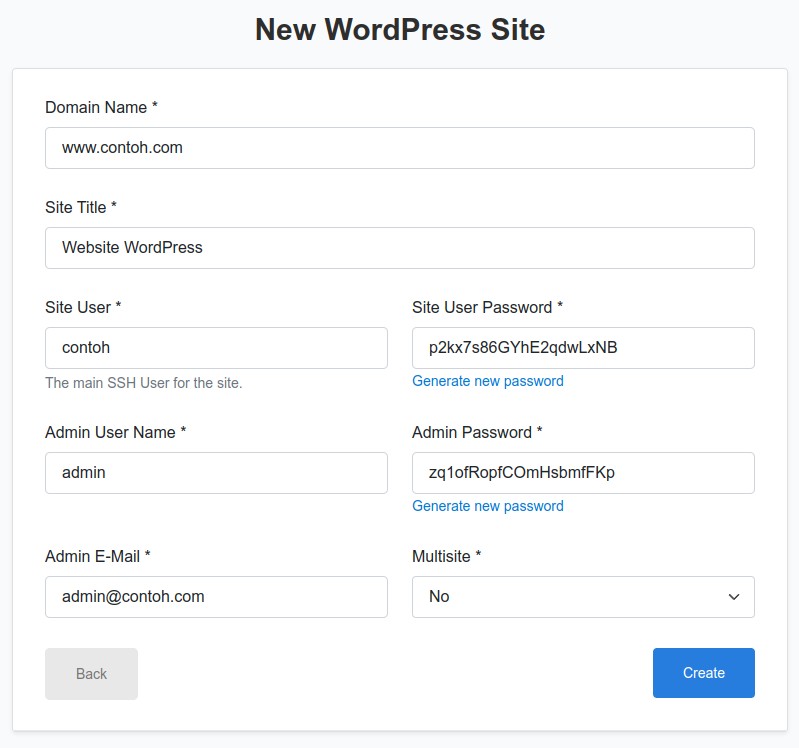
4. Add a Website
Steps to add a website:
- Click the
Sitesmenu, then+ADD SITE. - Select the type of website you want to host, for example, WordPress, and choose
Create a WordPress Site. - Fill in the WordPress website creation form, then click
Create. - Once completed, the credentials and information for the created website will be displayed.
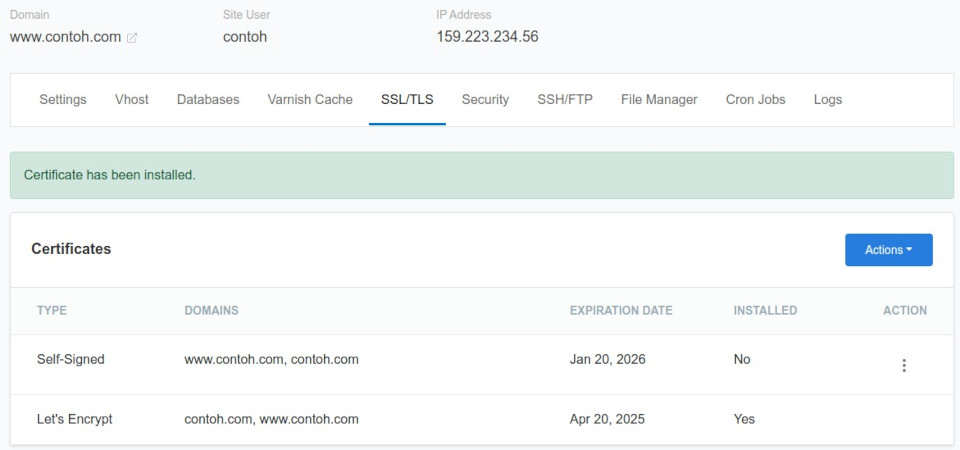
5. Install SSL
Steps to install SSL:
- Click the
Sitesmenu, then clickManageon the website you want to manage. - Click the
SSL/TLStab, then theActions > New Let's Encrypt Certificatebutton. - Click the
Create and Installbutton. - If successful, the message
Certificate has been installedwill be displayed.